Pool Cage Painting Guide When to Repaint, Prep Steps and Durable Finish Options
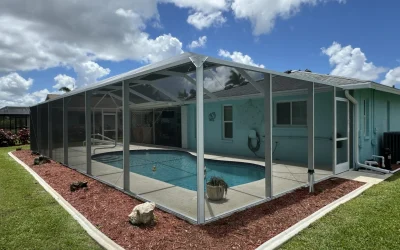
A pool cage takes a beating in Florida-style weather: sun, salt air, humidity, and constant rain cycles. Over time, even a well-built enclosure starts to look chalky, faded, or spotted with corrosion. The good news is that pool cage painting can dramatically refresh the look and help protect the aluminum frame if you repaint at the right time and prep it correctly.
The guide shows you all the steps needed to complete a painting project, from exterior repainting times to essential preparation work, and all available paint finish options that provide the best durability. The appearance of your paint job will be better when you link your painting work with your upcoming rescreening, screw replacement, and repair projects.
When pool cage painting is the right move
Not every enclosure needs paint right away. Sometimes, a deep cleaning and a few targeted repairs are enough. But if you’re seeing any of the issues below, repainting is usually the more satisfying long-term fix.
- Oxidation that causes fading or chalkiness: Despite cleaning, the surface still has a dusty, chalky, or uneven appearance.
- Flaking or peeling of the coating: This indicates that the old coating is failing, exposing the underlying metal.
- Whitish discoloration or pitting: an early sign of corrosion. It often occurs near fastening hardware.
- Stains that won’t lift: Mildew, sprinkler minerals, or environmental staining that keeps returning.
- Uneven sections: The frame color does not match after any work on screen repair, enclosure addition, or panel replacement.
One useful principle: In case the enclosure is intact but needs a fresh look, painting is a good idea. But if there are issues like loose panels, damaged screens, and hardware problems, fix them first by considering the services listed at Pool Enclosures Construction, Repair, & Maintenance, Screen Repairs, or Enclosure Screw Replacement.
Before you repaint: quick checks that prevent wasted work
No matter how good your paint job is, it can only be as good as the substrate that it coats. Spend some time inspecting the surface to avoid repainting in the near future.
Walk the enclosure and look closely at:
- Fasteners and corners: Rusted or stripped screws are a common source of staining and corrosion spread. Consider Enclosure Screw Replacement before painting.
- Screen condition: If you’re due for Rescreening or have multiple tears, it’s often easier to plan that work alongside painting to avoid overspray concerns and repeated labor.
- Rails and base tracks: These areas collect debris and moisture. If pitting is heavy, you may need more aggressive prep.
- Add-ons and attachments: Pool Enclosure Accessories, doors, and hardware should be checked for corrosion and fit.
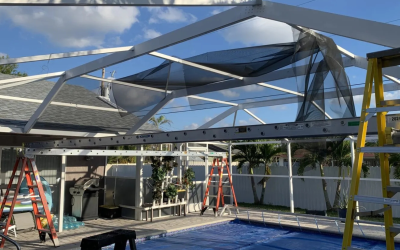
If your project includes changes like Screen Enclosure Additions or a new build through Pool Enclosures Construction, it’s typically best to finalize the construction first, then paint for a consistent finish across old and new framing.
Prep steps that make a durable finish (and where people go wrong)
The first problem in painting is often surface preparation. “It’s pretty simple: just clean out dirt or deposits, slow down the corrosion, and make sure the new layer sticks to the surface. It should be done with extreme care to avoid damage to the screens, seals, and other nearby surfaces.
1) Clean thoroughly (more than a quick rinse)
Start your cleaning process with a thorough wash. The complete wash process will eliminate all dirt particles and sunscreen and mildew and airborne contaminants. The lower railings, gutter areas, and sprinkler contact zones require special attention during cleaning. The surface needs to be cleaned because rainwater can cause stains to return. You need to clean it thoroughly before you start painting.
2) Address oxidation and chalking
This appearance is due to oxidation. The paint will not work, as it will bind to loose substances rather than solid aluminum in the case of over-chalking. To achieve a stable surface, one has to roughen or lightly treat the surface.
3) Repair first, then prep again
Before the last cleaning, make sure to fix everything, like screens, rescreening, or pool enclosures. This is because there is a chance of leaving behind metal scraps, fingerprints, sealants, or even rusted areas.
4) Protect what shouldn’t be painted
There is no guarantee that these issues will be corrected. It takes time to mask your screens, deck, pool water, furniture, and landscaping. For instance, if you have Screen Room, Front Entryway Screening, or a Lanai Screen Enclosure leading to the pool area, take care to mask the transition for a seamless finish rather than something that seems patched together.
5) Don’t ignore the weather and cure time
Humidity, wind, and even rain might affect the adhesion and create a rough surface. Prepare for favorable weather, and wait until the paint dries completely before washing the box or exposing it to excessive moisture. If you do not take your time, the coating will last one month before peeling at the joints.
Durable finish options: what holds up best on aluminum
Selecting a finish involves more than selecting a color. The performance of a finish depends on its ability to withstand ultraviolet radiation, water damage, and temperature changes throughout the day. The optimal choice for you will depend on the condition of your frame and your desired level of perfection for the finished product.
Option A: Recoat for a clean, uniform refresh
If the structure is in good condition, then it can be kept. In case rust spots are few, a good coating will give it a flawless finish. This option is often preferred when the enclosure is still intact but appears old and worn.
Option B: Targeted restoration for problem areas
The enclosure usually works. The bottom rails, door frames, and fastening points are some of the parts of the enclosure that wear out faster. It is better to repair and refinish the stressed areas than to apply a single coat to the entire enclosure.
Option C: Coordinate painting with upgrades
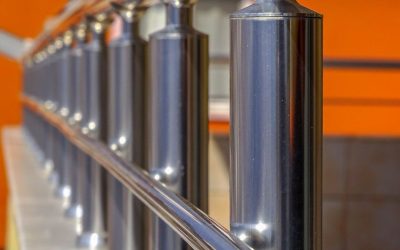
If you are already making investments in your home with features such as Screen Enclosure Additions, Pool Enclosure Accessories, or Aluminum Railings, then painting will bring everything into harmony aesthetically. Coordinating new additions with existing parts is why people often hire pool cage painting services.
Actionable planning: a simple repaint checklist
Use this checklist to plan a smoother project and reduce the odds of redoing work:
- Decide the scope: full enclosure vs. specific sections (doors, rails, or problem sides).
- Make repairs first: Screen Repairs, Rescreening, and Enclosure Screw Replacement before final preparations.
- Check attachments: Ensure Pool Enclosure Accessories are secure and free of corrosion.
- Plan for the weather: Pick a time when it is unlikely to rain or when the wind will not be too strong.
- Think about connected structures: if you also have Carports & Patio Covers or a Garage Door Screen nearby, consider whether you want finishes to coordinate.
This approach also works for other screened structures, such as Screen Rooms, Front Entryway Screening, and Lanai Screen Enclosures, because the same enemies (UV, moisture, oxidation) affect aluminum framing across the property.
Common mistakes that shorten the life of a repaint
Even the best-looking paint job can come undone early on if some basic steps are skipped. Be alert to these common problems:
- Painting over oxidized metal results in peeling.
- No hardware adjustments: old hardware that still causes discoloration and corrosion will do so even after applying the new paint.
- Improper joint preparation: corners or connections can trap water, leading to coating failure.
- Inadequate curing time: premature washing or overexposure to moisture can compromise the coating’s quality.
If your enclosure has recurring trouble spots, it’s often a sign you need a more complete maintenance approach, not just a cosmetic coat, especially on older pool enclosures that have been repaired multiple times.
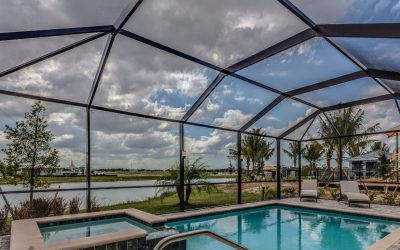
A new coat of paint can bring an old pool enclosure back to life. But lasting results come from the work people do not always notice, like checking the frame, cleaning it well, removing oxidation, and fixing small issues before painting begins.
Pool cage painting works best as part of a full care plan that may include pool enclosure construction, repair, maintenance, rescreening, and screen repairs. With the right care now, you can enjoy a cleaner look and avoid bigger problems later. Key Screening is here to help you understand your options and choose the best solution for your home.
To stay current with us, please follow our Facebook and Instagram pages.